 Purchase your generator for the best price at Amazon.com!
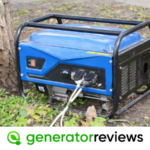
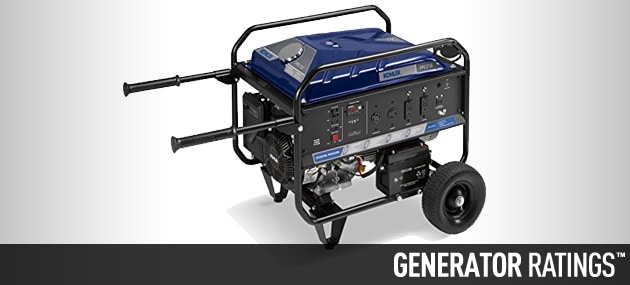
The Gen 5.0 is Kohler's entry-level generator, designed for temporary or low-use situations like camping or power outages.
The 4,300 continuous watts of 120/240 VAC energy is sufficient for most home appliances. However, this generator can't be used for sensitive devices because it produces a modified sine wave.
| Specifications |
|---|
| Up to 5 kilowatts of power. |
| 4.3 kW Steady Power. |
| Receptacles/Outlets, 120V 20A Duplex (2), Locking 20 Amp 120/240 Volt. |
| 120/240 V AC, 4300 watts continuous (35.8/17.9A), 5000 watts peak (41.6/20.3A). |
| Non-Amplified Direct Current (DC) Output. |
| Twenty hours of operation time while operating at 50% capacity. |
| 7 meters away, the volume is between 73.1 and 75.4 dB. |
| 60 hertz (Hz). |
| Defense-grade Automatic Voltage Regulator. |
| Compliance: U.S.A., excluding California, Environmental Protection Agency United States of America, CARB. For the country of Canada, see CSA. |
| Inclusion of Modifications: Yes. |
| Generator Idling Not Permitted. |
| There is no maintenance reminder. |
| There is no hour meter. |
| There is an Oil Sentry. |
| Gasoline Level Indicator: Yes. |
| Combustion chamber volume: 429 cc. |
| Total Capacity of 1.3 Liters of Engine Oil. |
| Fuel: Hydrogen Gasoline. Total Fuel Capacity of 8 Gallons. |
| Measures 29.4 x 21.4 x 22.3 inches (LxWxH). |
| Weight of 199 pounds. |
| Business Guarantee for the First 90 Days. |
| Three-Year Guarantee for Regular Customers. |
First, give the generator some space, keeping it at least 3.3 feet (1 meter) from any walls or other machines.
Two, make sure you read all cautionary labels before beginning.
Inspect the oil level by removing the oil fill plug. When the oil level drops, you must replenish it.
Ensure there is sufficient gas by checking the gauge. When fuel is low, fill up. After the gauge reads F (full), you are no longer allowed to add further fuel. Fuel system components and lines should be inspected for leakage. Never add more fuel to a running vehicle.
Make sure there are no blockages in the air inlets or on the air cleaner components, and that all covers and guards are in place and securely fastened.
Make sure the generator is disconnected from all power sources (load).
Once the generating set's running speed has stabilized, which should take around three minutes, check to see if the circuit protectors have been put in. In the event that it is necessary, please press.
Connect electrical appliances to the generator's outlets.
The ON/OFF switch controls the ignition system.
ON: The switch that starts the engine has been flipped. The motor can possibly be started.
OFF: The keyless ignition system has been disabled. The vehicle's engine will not turn over.
To do this, first disconnect the electrical sockets, which will allow the engine to run for a minute or two without any load.
Turn the generator off by sliding the ON/OFF switch to the OFF position.
Turn off the gas.
Once the generating set's running speed has stabilized, which should take around three minutes, check to see if the circuit protectors have been put in. In the event that it is necessary, please press.
Connect electrical appliances to the generator's outlets.
After the first 5 hours, you should change the oil.
Assuming a yearly schedule of 100 hours, you should: clean the low-profile air purifier. Do an oil change. Clean the cooling areas.
Every 200 hours, the engine should have the valve clearance checked and adjusted when it is cool.
Every 300 hours, swap out the low-profile air cleaner element. Check the gas tank's filter and clean or replace it if necessary.
Every 500 hours, or once a year, you should replace the set gap and replace the spark plugs.
Kohler oils are recommended for maximum efficiency. Other high-quality detergent oils, both natural and synthetic, with an API (American Petroleum Institute) service class of SJ or higher are acceptable alternatives. Determine the optimal viscosity based on the ambient temperature.
In order to avoid costly repairs, make sure the oil level in your engine is always within the operating range shown on the dipstick.
You absolutely need a cool motor to do the check. Clean out the oil fill plug and dipstick to start with.
Then check the oil level by removing the dipstick/oil fill plug. The dipstick's level should be at the top of the gauge.
Pour the oil into the filler neck with oil if necessary.
Reinstall the oil fill plug/dipstick and ensure it is snug.
It's best to swap out the oil when the engine is warm.
To begin, remove the oil drain plug and oil fill plug and clean the area surrounding them.
Take off the dipstick and the oil drain stopper. Remove all the oil.
Switch out the plug for the oil drain.
Add new oil to the crankcase until it reaches the top of the filler neck.
Replace the oil fill plug/dipstick and ensure it is tightly in place.
Eliminate used oil in compliance with local rules.
Please be aware that the results of taking E15, E20, or E85 are NOT guaranteed, are NOT approved, and are NOT to be used.
These standards must be met by the fuel: Clean, unleaded gas, and have an octane rating of at least 86(R+M)/2.
RON (Research Octane Number) of 91 at the lowest.
Using up to 10% ethyl alcohol and 90% unleaded gas is fine.
Blends of unleaded gasoline and MTBE (up to 15% MTBE content) are ok too.
In no circumstances should oil and gasoline be combined.
Don't let the gas tank get too full.
Gasoline that is older than 30 days should never be used.
To make sure there is enough gas, just look. Fill up if necessary.
Take off the cap from the gas tank.
Using a funnel, carefully add gas until the gauge reads "F," and stop adding gasoline when the tank is full.
Put a good amount of force into closing the gasoline tank's cover.
Turn the gas tank's cap clockwise.
Second, take the fuel filter out of the tank neck.
Third, clean the gasoline filter with a non-flammable or high flash point solvent). Remove any moisture. Change out as necessary.
Reinstall the filter.
Replace the cap on the gas tank.
First, after taking off the cover's screws and nuts, turn the fuel valve off.
Take off the lid.
Remove the sediment receptacle.
When cleaning the sediment bowl, make sure to use a solvent that has a high flash point or is non-flammable. Remove any moisture.
Take a look at the cover and gasket for the sediment bowl. They should be replaced if they are damaged.
Get the sediment basin back in place.
Activate the gas tank on-off valve.
Look for leaks, then use a dry cloth to remove any lingering gas.
The spark plug recess must be spotless.
First, verify the space using a wire feeler gauge.
Second, put the spark plugs into the top of the engine's cylinders.
Third, tighten the spark plug's nut to 20 ft-lbs (27 Nm).
If your engine's air filter parts are loose or broken, you risk premature wear and failure if you continue to run the engine. Parts that have been broken or bent must be replaced immediately.
First, unscrew and take off the cover of the air cleaner.
Next, remove the air cleaner's foam pad.
Wash the foam component with warm water and detergent. After you're done washing, your hair should dry naturally.
Lightly oil the foam element with fresh motor oil, and then squeeze off any excess oil.
Then, replace the air cleaner's foam element in its base.
Finally, re-fasten the air cleaner cover screw.
Selecting an appropriate cooling method is critical. To prevent overheating, ensure that the surfaces where air enters and leaves the cooling system are clean and transparent. Never get water on a wiring harness or any other electrical part. Check the upkeep plan.
To avoid electrical shock, the earth line is linked to the ground terminal. When you're grounding an electric device, don't forget to do the generator as well.
How to ground the generator: Join a 6-gauge (10 mm2) copper wire to the generator's ground terminal and a 3-foot-long (1-meter) galvanized steel ground rod driven into the ground.
Make sure the wires and plugs are in good shape and the electrical equipment is in good operating order before hooking up to the generator.
The total load cannot be more than the generator can handle.
Verify that the receptacle's load current does not exceed the receptacle rated current.
Then you start the engine
The second step is to plug it into the A/C receptacle.
Turn on any and all electrical devices.
The AC rated power of a generator indicates its maximum output under ideal conditions.
A/C surge power is the temporary boost in output that a generator provides at the outset of electrical loads that are more demanding than the generator is designed to meet. Aka the starting watts.
When using a generator constantly, never exceed its rated capacity (in Amps or Watts).
Prior to hooking up and running the generator, determine how much power your electric appliances will need (in Watts). The electrical power rating is often found on the manufacturer's plate on lights, electrical appliances, motors, etc. The overall electrical load of all these devices must be below the generator's rated output.
When an electrical device overload is detected or the voltage of the AC output rises, circuit protectors will turn off power to protected receptacles, protecting the generator and any attached electric devices.
Here's what to do if an overload causes power to be cut off:
First, turn off the generator and all other electrical devices.
If possible, reduce the total wattage of all electrical devices that are connected within the scope of use.
Third, make sure there are no obstacles around the control unit or the cooling air's inlet and outlet. If you come across any obstacles, get rid of them.
Once you're done checking, restart the generator.
Get rid of any dirt or debris that may be near the vents.
Make sure the alternator and engine air inlets and outlets are spotless by wiping them down with a clean cloth and brush.
Make sure the entire producing set is in good shape and fix any problems you find.
Before relocating the generator, make sure the fuel valve is closed, the battery is disconnected, and all bolts are tightened. Keep your generator upright when carrying it; never lie it down. Be sure to get the place ready ahead of time where the generator will be used or stored.
If your portable Kohler engine needs maintenance, servicing, or replacement parts, look no further than an authorized Kohler dealer. To find a Kohler portable dealer near you, call 1-800-544-2444 or visit KohlerPower.com (U.S. and Canada).
It's important to take some measures to ensure that your generator stays in good condition while it's stored for a long time.
If the engine will be out of action for more than two months, proceed as described below.
Add fuel treatment, preferably from the Kohler PRO Series although other brands will do. To inject stabilized fuel into the fuel system, start the engine and let it run for two to three minutes.
Second, it's best to swap out the oil while the engine is still warm. Remove the spark plug and pour about an ounce of engine oil into the cylinder. Put in a new spark plug, and then slowly rev the engine to distribute the oil.
Do a full clean of the generator.
Make sure the generator is covered and kept in a dry, well-ventilated place. Carefully wait until the engine, muffler, and shield have cooled down before covering the generator.
Make sure the storage area is clean and dry at all times.
Ultimately, the Kohler GEN5.0 Generator is an excellent first-time generator purchase. Because of its high quality construction, abundant features, robustness, and user-friendliness.
There is no hesitation in my mind about strongly recommending that this generator is likely a good purchase for you.